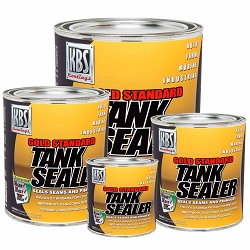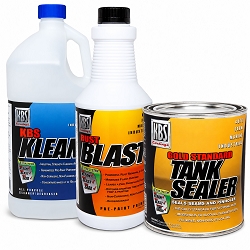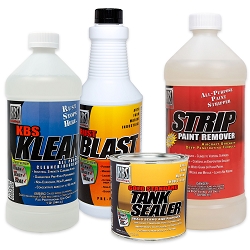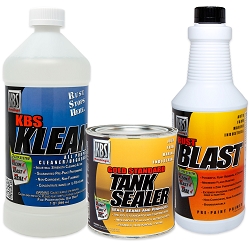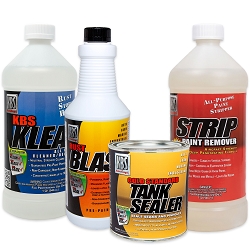



To seal a gas tank, drain and remove it, clean the inside with KBS Klean, prep the metal with RustBlast, then pour in Gold Standard Tank Sealer, roll it over every surface and drain the excess. The tank cures fuel-ready in 96 hours. The video below shows all three steps.
Updated November 2026 by the KBS Coatings technical team.
Watch: Sealing a Gas Tank Step by Step
This 7 minute KBS video follows one tank through the full KBS Tank Sealer System, from the first KBS Klean soak to the final drain of Gold Standard Tank Sealer. Watch it once before you start, then use the steps below as your checklist.
| Products | KBS Klean, RustBlast, Gold Standard Tank Sealer |
|---|---|
| Application temperature | 55 to 82 degrees F, during application and for 6 hours after |
| Coats | One coat: pour, roll for up to 30 minutes, drain |
| Prep window | Seal within 10 days of finishing RustBlast |
| Cure before fuel | 96 hours, then test with water |
| Heat rating once cured | 600 degrees F |
What You Need
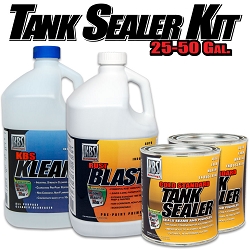
A gas tank job needs three KBS products, used in this order: KBS Klean to clean, RustBlast to treat rust and etch the metal, and Gold Standard Tank Sealer to coat the inside. Each KBS tank sealer kit puts all three in one box, sized to the tank.
- KBS Klean: mixed 1 to 1 with hot water to strip fuel varnish, grease and loose rust from the inside of the tank
- RustBlast: used full strength to treat rust and leave a zinc phosphate layer that helps the sealer bond
- Gold Standard Tank Sealer: sized to the tank, from an 8 oz can for tanks up to 5 gallons to a gallon for tanks up to 100 gallons
- Hurricane Paint Mixer (optional): mixes the sealer on a drill at low speed; skip it if you stir by hand
- KBS Paint Spout (optional): pours the sealer into a small filler neck without spills; skip it on a tank with a wide opening
- KBS #1 Thinner: cleans tools and threads while the sealer is still wet
- Duct tape or rubber stoppers for the openings, plus a handful of nuts and bolts or a short chain to knock loose rust free
- Chemical-resistant gloves, safety glasses and a well-ventilated work area
Step 1: Clean the Tank With KBS Klean
KBS Klean goes into the tank at full strength, 1 part KBS Klean to 1 part hot water, and soaks out old fuel varnish, grease and loose rust. The standard 10 to 1 KBS Klean dilution is for general cleaning; inside a tank, use it 1 to 1.
- Drain all of the fuel and remove the tank from the vehicle.
- Remove the fittings and plug every opening with duct tape, rubber stoppers or similar.
- Pour in the KBS Klean mix, close the openings, and soak the tank while you rotate it from time to time. Heavy buildup can take up to 24 hours.
- Add a handful of nuts and bolts or a short chain and shake the tank to break up stubborn rust.
- Strain the solution and repeat as needed, checking the inside with a flashlight for loose rust.
- Rinse until the water runs clear, then dry the tank completely before Step 2.
Step 2: Prep the Metal With RustBlast
RustBlast goes in at full strength with no water added, and the tank is rolled and tipped every 5 minutes for 30 to 60 minutes. RustBlast works between 55 and 90 degrees F and works faster on warm metal. You do not need to remove every last bit of rust, because Tank Sealer bonds directly to prepped rust.
- Pour in RustBlast and roll and tip the tank every 5 minutes for at least 30 to 60 minutes. Do not let RustBlast dry on the surface.
- Drain and capture the RustBlast, and repeat for heavier rust.
- Rinse once with water. Skipping the rinse leaves too much zinc phosphate behind, and rinsing over and over removes all of it; a thin white, powdery zinc phosphate layer should stay because it helps the sealer bond.
- Dry the tank completely with forced air, a shop vac, a blow dryer, a fan or a heat gun.
- Let the tank cool to room temperature, out of direct sunlight, before Step 3.
Step 3: Seal the Tank With Gold Standard Tank Sealer
Gold Standard Tank Sealer is a single-coat, pour-and-drain liner: the whole can goes in, the tank is rolled for up to 30 minutes, and every drop of excess comes back out. Apply it between 55 and 82 degrees F within 10 days of finishing RustBlast, then give it 96 hours to cure before fuel.
- Stir the sealer thoroughly, touching the bottom of the can and lifting. Do not whip or shake it, which traps air bubbles. A Hurricane Paint Mixer on a drill at low speed works well.
- Pour the entire can into the tank, then rotate and roll the tank for up to 30 minutes so every inside surface gets one thin coat.
- Drain all of the excess. Keep turning the tank side to side every 5 minutes while it drains so the sealer cannot pool.
- Watch for foaming or bubbling as it drains. That is a sign of trapped gas and can mean the tank needs to be stripped and redone.
- Use any leftover sealer right away for exterior patching. Drained sealer cannot be saved or poured into another tank.
- Wipe sealer off threads and fuel lines with KBS #1 Thinner before it cures, and leave the lid off the can that caught the drained sealer until it hardens.
- Keep the tank and the sealer between 55 and 82 degrees F for 6 hours after application. Leave the openings open and let the tank air dry away from direct sun and heat, which hinder adhesion.
- Allow a full 96 hours for maximum cure, then test the tank with water before you add fuel.
Stuck or unsure? Search the KBS Support Desk for instant answers
Every metal tank gets all three products, in this order:


Gold Standard Tank Sealer
Lines the inside of the tank and seals pinholes and weld seams.
Pinholes, Fiberglass, Plastic and Previously Sealed Tanks
Gold Standard Tank Sealer works in steel, aluminum and fiberglass tanks that hold gas, diesel, biodiesel or oil, and it seals pinholes and leaky weld seams from the inside. Four situations change the process, and each one is covered in the Tank Sealer directions.
Pinholes and Small Holes
Pinholes and weld seams get an exterior patch of BackBone Reinforcing Mesh. Seal the inside first, then brush a thin coat of Tank Sealer over the outside of the repair, embed the mesh, and add a second thin coat once the first has set. Holes larger than a pinhole get NuMetal Epoxy Putty: scuff the area with 320 grit, apply the putty, and let it cure 12 hours before you seal the interior.
Fiberglass Tanks
Fiberglass tanks use the same three steps with one change: RustBlast stays in contact for only 2 minutes, because longer contact can weaken the resin. Dry the tank completely and coat the entire inside. Cured Tank Sealer is impervious to the alcohol in blended fuels. CAREFUL: Any bare spot left on fiberglass lets that alcohol attack the resin, and the sealer can delaminate there over time.
Plastic Tanks
Gold Standard Tank Sealer will not bond to a plastic or polyethylene tank by itself. Plastic tanks get Fusion SEP first, cured overnight, then Tank Sealer. The Plastic Fuel Tank Sealer Kit includes both, along with KBS Klean.
Tanks Sealed Before
Any old liner has to come out completely before Step 1. KBS Strip works between 60 and 85 degrees F and best above 70 degrees F; pour it in, rotate the tank, repeat as needed, and rinse thoroughly. KBS Strip can be strained and reused.
Frequently Asked Questions About Sealing a Gas Tank
How to seal a leaky fuel tank?
Drain and remove the tank, then run the KBS 3-step system: KBS Klean, RustBlast, then Gold Standard Tank Sealer, which seals pinholes and leaky weld seams from the inside in a single coat. Reinforce pinholes and weld seams on the outside with BackBone Reinforcing Mesh set in a thin coat of Tank Sealer. Fill holes larger than a pinhole with NuMetal Epoxy Putty first and let it cure 12 hours before you seal the interior.
How do I seal a rusty gas tank?
Clean the tank with KBS Klean mixed 1 to 1 with hot water, then fill it with full strength RustBlast and roll it every 5 minutes for 30 to 60 minutes. Rinse once, dry the tank completely, and pour in Gold Standard Tank Sealer within 10 days. You do not need to remove every last bit of rust: Tank Sealer bonds directly to prepped rust.
What should I do if my petrol tank is leaking?
Drain all of the fuel and remove the tank from the vehicle, working in a well-ventilated area with gloves and safety glasses. Patch the outside of the leak with NuMetal Epoxy Putty or BackBone Reinforcing Mesh, then clean, prep and seal the inside with KBS Klean, RustBlast and Gold Standard Tank Sealer. Allow 96 hours of cure and test the tank with water before you add fuel.
How long does Tank Sealer take to cure before adding fuel?
Gold Standard Tank Sealer needs a full 96 hours for maximum cure before fuel goes back in. Leave the tank openings open so air reaches the coating, keep the tank out of direct sun and away from heat, and test it with water before you add fuel. Cold weather after the first 6 hours does not harm the seal but stretches the cure past 96 hours.
Can I use Gold Standard Tank Sealer on a plastic gas tank?
Not by itself. Gold Standard Tank Sealer will not bond to a plastic or polyethylene tank on its own. The tank needs a coat of Fusion SEP first, cured overnight, and then Tank Sealer. The Plastic Fuel Tank Sealer Kit contains KBS Klean, Fusion SEP and Gold Standard Tank Sealer for this job.
How much Tank Sealer do I need?
Gold Standard Tank Sealer is sized by tank capacity: an 8 oz can seals a tank up to 5 gallons, a pint up to 12 gallons, a quart up to 25 gallons and a gallon up to 100 gallons. The whole can goes into the tank, and the excess drains back out.
Does Tank Sealer hold up to ethanol fuel?
Yes. Cured Gold Standard Tank Sealer is impervious to the alcohol additives in fuel, is compatible with E10, E15 and E85, and resists diesel. In a fiberglass tank, coat the entire inside: alcohol attacks any bare spot of fiberglass the sealer missed, and the sealer can delaminate there over time.
More answers are in the Tank Sealer FAQs, and the tank size guide matches a kit to your tank.
Still have questions? Search the KBS Support Desk for instant answers
Choosing a Tank Sealer Kit
Gold Standard Tank Sealer is tested for at least 5 to 10 years of service. Pick the kit that matches your tank's capacity and it arrives with KBS Klean, RustBlast and the right size of Tank Sealer for that tank.
Related guides: How to Seal a Rusty Fuel Tank in 3 Steps, How to Reseal a Gas Tank Inside and Out, Sealing a Gas Tank With the KBS Tank Sealer System, or browse all KBS application guides.
Tagged Products