

To seal a plastic or polyethylene fuel tank, clean it with KBS Klean, primer etch it with Fusion SEP, then seal it with Gold Standard Tank Sealer. Patch any holes or cracks first with NuMetal Epoxy Putty or KBS Patch, since the sealer coats a tank wall but will not bridge an opening.
Updated September 2026 by the KBS Coatings technical team.
| Products | Fusion SEP, Gold Standard Tank Sealer |
|---|---|
| Fusion SEP roll time | Up to 15 minutes, then drain immediately |
| Tank Sealer roll time | Up to 30 minutes, then drain until dripping stops |
| Tank Sealer cure | 96 hours before adding fuel |
| Ideal application temperature | 55 to 82 degrees F |
| Fuel compatibility | Gasoline, diesel, E10, E15, E85 |
Why Plastic Fuel Tanks Weep and Leak
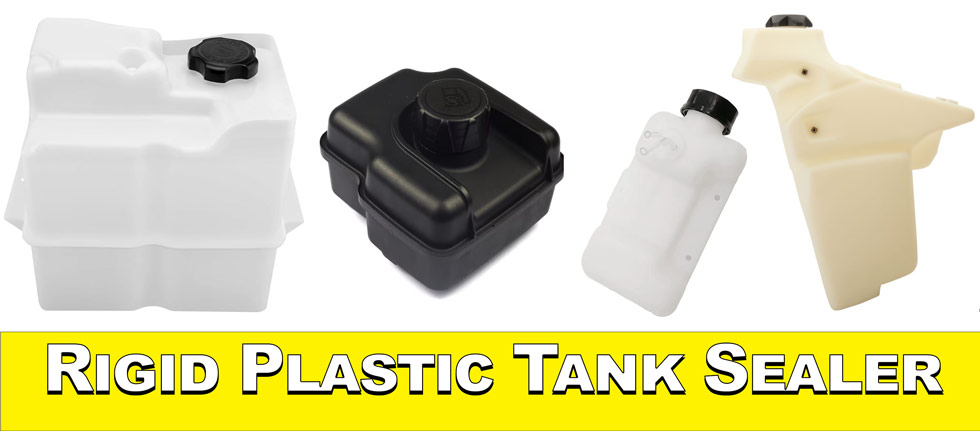
Plastic fuel tanks turn porous with age, and ethanol blended fuel speeds up the process. The result is a tank that is not visibly cracked but still smells of gas, leaves a damp film on the outside, or slowly loses fuel as vapor passes straight through the tank wall.
- Common on lawn tractors, ATVs, generators, and other outdoor power equipment
- Ethanol blended fuels (E10, E15, E85) accelerate the porosity
- No visible hole or crack, just a slow, steady loss of fuel
- Left alone, the tank keeps weeping and the smell of fuel gets worse
Weeping Tank or Cracked Tank? How to Tell the Difference
A weeping plastic tank has no visible opening: the outside feels tacky or damp, the tank smells strongly of fuel, and the level drops slowly with no puddle underneath. A cracked or holed tank drips or streams from one identifiable spot, usually along a mold seam, at a mounting boss, or where the tank has been struck or rubbed through.
If you are unsure which problem you have, drain the tank, wipe it completely dry, and fill it with water. Water finds a hole that fuel vapor was only weeping through, and it costs nothing to check. A weeping tank gets sealed as described below; a cracked or holed tank gets patched first.
What You Need
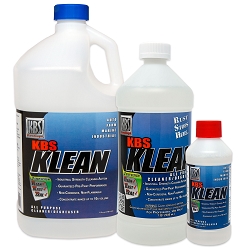
- KBS Klean: degreases the tank interior so the primer etch can bond
- Fusion SEP: primer etches the plastic so Gold Standard Tank Sealer has a surface to bond to
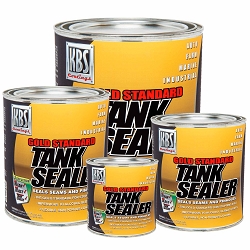
- Gold Standard Tank Sealer: permanently seals the inside of the tank
- NuMetal Epoxy Putty (optional): skip it when the tank has no holes or cracks
- KBS Patch (optional): a UV cured alternative to NuMetal for patching; not compatible with polypropylene
- Hurricane Paint Mixer (optional): mixes Fusion SEP or Gold Standard Tank Sealer thoroughly in the can before pouring it into the tank
- KBS Paint Spout (optional): makes pouring into the tank opening easier
- Chemical-resistant gloves, safety glasses, and proper personal protective equipment
Unopened KBS products last about 2 years; once opened, about 6 months in a cool, dry place. Test any product that has been open a while by stirring it before use.
Patch Holes or Cracks Before You Seal
Patch every hole or crack before you seal a plastic tank, since Gold Standard Tank Sealer is a coating, not a filler, and will not bridge an open hole or a split seam. Sealing over unrepaired damage wastes the kit and leaves the tank leaking.
- Clean the area with KBS Klean and let it dry
- Scuff the area to be patched with 320 grit sandpaper
- Apply KBS NuMetal Epoxy Putty or KBS Patch per its own instructions
- Allow a full 12 hours of cure before moving on to Step 1 below
- Any leftover Gold Standard Tank Sealer can later be brushed over the outside of the repair to reinforce it
KBS Patch works on most plastics but is not compatible with polypropylene; NuMetal Epoxy Putty bonds to plastic, metal, wood, fiberglass, concrete, and ceramic and is the safer default when the tank material is unknown.
Stuck or unsure? Search the KBS Support Desk for instant answers
How to Seal a Plastic Fuel Tank
Sealing a plastic fuel tank takes three steps in order: clean with KBS Klean, primer etch with Fusion SEP, then seal with Gold Standard Tank Sealer. Work through a patched and fully cured tank only; a wet or freshly patched tank will not seal properly.
Step 1: Clean the Tank with KBS Klean
Clean the tank first with KBS Klean, since any residue left behind can keep the primer etch from bonding.
- Mix KBS Klean 1:1 with hot water
- Pour into the tank and rotate at intervals so it reaches every surface
- Rinse until the water runs clear
- Let the tank dry bone dry before moving on
Full kit directions: Plastic Tank Sealer directions.
Step 2: Primer Etch with Fusion SEP
Fusion SEP primer etches the plastic so Gold Standard Tank Sealer has a surface to bond to, since plastic has no rust to remove and almost nothing sticks to it without this step.
- Stir Fusion SEP; do not shake it
- Pour the full can into the dry tank
- Roll the tank for up to 15 minutes until every surface is coated
- Drain the excess immediately; Fusion SEP is designed to work as a thin film and must never be left to puddle
Seal the tank within 10 days of cleaning and prepping it. A prepped tank left sitting longer picks up moisture and contamination, and the adhesion Fusion SEP created starts working against the bond rather than for it.
Stuck or unsure? Search the KBS Support Desk for instant answers
Step 3: Seal with Gold Standard Tank Sealer
Apply Gold Standard Tank Sealer as a single coat once the tank is clean, etched, and completely dry, taking care to coat every interior surface.
- Stir thoroughly without whipping
- Pour the sealer into the tank
- Roll the tank for up to 30 minutes, rotating side to side every 5 minutes
- Drain all excess until it stops dripping
- Any spot left uncoated stays vulnerable to alcohol blended fuel; foaming or bubbling means sealer pooled and did not drain, and the only fix at that point is to strip the tank and start over
Allow 96 hours for full cure before adding fuel. Keep the tank out of direct sun and away from direct heat; heating will not cure the sealer faster and may hinder adhesion. Drained sealer cannot be saved or reused, so brush any leftover onto the outside of a patched repair right away rather than trying to save it for another tank. Clean up tools immediately with KBS #1 Thinner or lacquer thinner, since cured sealer cannot be removed by any solvent. Product page: Gold Standard Tank Sealer.


Which Kit Size Do You Need?
Choose the KBS Plastic Tank Sealer System by tank capacity, not by how porous the surface looks. Each size scales the amount of KBS Klean, Fusion SEP, and Gold Standard Tank Sealer to match the tank.
| Tank Size | KBS Klean | Fusion SEP | Gold Standard Tank Sealer |
|---|---|---|---|
| 0 to 5 Gallon Tank | 8 oz | 8 oz | 8 oz |
| 5 to 12 Gallon Tank | Quart | Pint | Pint |
| 12 to 25 Gallon Tank | Quart | Quart | Quart |
If a tank capacity falls right on a boundary, size up. Running short of sealer partway through a tank is not recoverable, since drained sealer has been exposed to atmospheric moisture and cannot be saved or reused for a second attempt.
Frequently Asked Questions About Sealing a Plastic Fuel Tank
What is the best sealant for a plastic fuel tank?
The best sealant for a hard plastic or HDPE fuel tank is a system built for plastic, not adapted from a metal kit. The KBS Plastic Tank Sealer System pairs Fusion SEP, a primer etch that gives Gold Standard Tank Sealer a surface it can bond to, since plastic has no rust to remove and almost nothing sticks to it on its own.
What is the best way to seal a hole in a plastic gas tank?
A hole or crack needs to be patched first, not sealed over. Gold Standard Tank Sealer coats a porous tank wall to stop weeping, but it will not bridge an open hole or a split seam. Patch the outside with KBS NuMetal Epoxy Putty or KBS Patch, cure it for 12 hours, then seal the inside of the tank.
What is a good sealer for plastic gas tanks?
Gold Standard Tank Sealer is a single component, moisture curing sealer built to bond to plastic once the surface has been primer etched with Fusion SEP. It reaches full cure in 96 hours and resists gasoline, diesel, and ethanol blended fuels including E10, E15, and E85.
How to seal a leaking plastic tank?
If the tank is leaking from a visible hole or crack, patch it first with NuMetal Epoxy Putty or KBS Patch and cure 12 hours. If the tank is weeping fuel through porous walls with no visible opening, clean it with KBS Klean, primer etch it with Fusion SEP, then seal it with Gold Standard Tank Sealer.
Does a plastic tank need to be patched before sealing?
Yes, if the tank has any hole or crack. Gold Standard Tank Sealer is a coating, not a filler, so it will not bridge an open hole or a split seam. Inspect the tank first and patch every hole and crack from the outside with NuMetal Epoxy Putty or KBS Patch before sealing the inside.
Will this work on a portable gas can or other flexible plastic container?
No. The KBS Plastic Tank Sealer System is built for hard, rigid plastic fuel tanks such as HDPE, not for flexible containers like portable gas cans or jerry cans. Flexing breaks the bond of the cured coating, so it is not suitable for anything that bends or compresses when squeezed.
How long does Gold Standard Tank Sealer take to cure?
Gold Standard Tank Sealer is touch dry in 4 to 6 hours at 77 degrees F and 50 percent humidity, but touch dry is not cured. Allow a full 96 hours before adding fuel, and keep the tank out of direct sun and away from direct heat during that time.
Still have questions? Search the KBS Support Desk for instant answers
Conclusion
Sealing a plastic or polyethylene fuel tank comes down to patching any damage first, then cleaning, priming and sealing in that order. Fusion SEP is the step a metal tank kit does not need and a plastic tank cannot skip, so do not rush it or the drain steps that follow. For the full official directions, working windows, and kit sizing, see the Plastic Tank Sealer directions and the Tank Sealer FAQ hub.
Related guides: How to Reseal a Metal Gas Tank Inside and Out, or browse all KBS application guides.
Tagged Products