


To paint a motorcycle exhaust, strip the pipes back to bare metal, leave a 60 to 80 grit surface profile, degrease with KBS Klean, then apply thin coats of XTC Zinc Rich Primer followed by XTC Xtreme Temperature Coating and heat cure the finish. Liquid XTC protects metal in continuous service from 500°F to 1500°F and is guaranteed not to burn off.
- Let the exhaust cool, then remove it from the bike.
- Strip old paint, rust and scale down to bare metal.
- Leave a proper surface profile by sandblasting, or with a wire wheel or 60 to 80 grit paper.
- Degrease with KBS Klean at 10 parts hot water to 1 part KBS Klean, rinse and dry.
- Apply 1 to 2 thin coats of XTC Zinc Rich Primer.
- Apply 1 to 2 thin coats of XTC in the color you want.
- Let the finish flash off for 8 hours, then heat cure it at about 350°F.
- Why Motorcycle Exhaust Paint Peels, Flakes or Burns Off
- Can a Rusty Motorcycle Exhaust Be Refinished?
- What Products Do You Need to Paint a Motorcycle Exhaust?
- How to Prepare a Motorcycle Exhaust for Painting
- How to Paint a Motorcycle Exhaust
- How to Cure Motorcycle Exhaust Paint
- Common Mistakes When Painting a Motorcycle Exhaust
- Frequently Asked Questions
- How to Make Motorcycle Exhaust Paint Last

Why Motorcycle Exhaust Paint Peels, Flakes or Burns Off
Motorcycle exhaust paint fails for two reasons: the coating never bonded to the metal, or it was asked to survive more heat than it was built for. Rust, oil, grease and old poorly bonded paint block adhesion. A coating rated for engine bay temperatures will burn off on a header pipe. Reading which of those happened tells you what to change before you refinish.
Peeling and flaking are adhesion failures. Rust, oxidation, oil, grease, dirt or the remains of an old coating keep the new film from bonding to the steel. Flaking also shows up when the surface was never scuffed to a proper profile, so the paint had nothing mechanical to grip.
Bubbling means something got trapped. Moisture, solvent or contamination under the film turns to vapor the first time the pipes get hot and pushes the coating off the metal. Heavy coats and short dry times between coats both cause it, which is why thin coats matter more on an exhaust than almost anywhere else.
Burn-off means the coating exceeded its temperature rating, or it never got heat cured. Ordinary automotive and engine paints are not built for the temperatures an exhaust reaches, particularly headers and the pipe sections closest to the engine.
Fix the cause rather than adding another coat over the damage. The coating system has to match the temperatures the exhaust actually sees, and its preparation, application, drying and curing steps all have to be followed.
Can a Rusty Motorcycle Exhaust Be Refinished?
A rusty motorcycle exhaust can usually be refinished when the corrosion is surface rust or minor pitting and the metal underneath is still sound. Inspect the pipes, collector and muffler for deep corrosion, thinning metal, rust-through, cracks or exhaust leaks first. Those need repair or replacement, because no coating restores metal that is already gone.

What Products Do You Need to Paint a Motorcycle Exhaust?
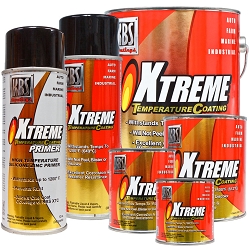
Painting a motorcycle exhaust takes three products: a cleaner that leaves no residue, a high temperature primer for corrosion protection, and a high temperature topcoat. This project uses KBS Klean to degrease the metal, XTC Zinc Rich Primer for rust protection, and XTC Xtreme Temperature Coating as the finish.
KBS Klean
KBS Klean is a concentrated water based cleaner and degreaser that strips dirt, grease and oil without leaving a residue behind to interfere with adhesion. It is always diluted with hot water, and the hotter the water, the harder it works. The XTC directions call for 10 parts hot water to 1 part KBS Klean for this prep wash.
XTC Zinc Rich Primer
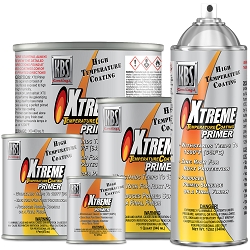
XTC Zinc Rich Primer is a silicone zinc rich primer rated for continuous service to 1200°F, and to 1500°F as a system when topcoated with XTC. It works the way galvanizing works: the zinc in the film sacrifices itself to protect the steel underneath, which stops rust and rust streaking on parts exposed to heat, humidity, condensation and salt air. That is exactly the life a motorcycle exhaust leads.
The primer is 100% UV stable, so it can be left as the finish coat if you like its matte grey look. It comes in six sizes from aerosol to a 5 gallon pail and applies by spray, brush or roller.
XTC Xtreme Temperature Coating
XTC Xtreme Temperature Coating is a silicone based high temperature paint for metal operating between 500°F and 1500°F, and it is guaranteed not to burn off. Once heat cured it resists thermal shock, UV, weathering, scratching and marring, and it will not peel, flake or chalk.
One number decides which version you buy. Liquid XTC is rated to 1500°F. XTC aerosols and XTC Primer are rated to 1200°F. Header pipes and the sections nearest the engine run hottest, so use liquid XTC there. XTC is not for parts that will be immersed, for direct contact with open flame, or for cooking surfaces.
How Do You Paint a Motorcycle Exhaust Black?
Paint a motorcycle exhaust black by topcoating XTC Zinc Rich Primer with XTC in Jet Black, which is a matte finish. XTC comes in 10 colors plus Clear, including Cast Iron Grey, Charcoal Metallic, Aluminum, Stainless Steel and Rocket Red, in sizes from aerosol up to 5 gallons. Most colors are matte, with Aluminum, Stainless Steel and Charcoal Metallic offered as matte metallics.
Tools and Supplies
Alongside the cleaner, primer and coating, gather what you need for removal, preparation, application and personal protection:
- Basic hand tools for removing and reinstalling the exhaust
- Safety glasses
- Chemical resistant gloves
- A NIOSH or MSHA approved organic vapor particulate respirator, required whenever you spray
- Wire brush or wire wheel
- 60 to 80 grit abrasive paper, plus finer paper for chrome and stainless
- Clean, lint-free cloths
- Masking tape and masking paper or plastic
- Brushes, rollers or spray equipment if you are applying liquid coatings
- KBS #1 Thinner for thinning and spray gun cleanup
- Drop cloths to protect the work area
How to Prepare a Motorcycle Exhaust for Painting
Preparing a motorcycle exhaust for paint takes four steps: remove the exhaust from the bike, strip the old coating and corrosion, create the surface profile the primer needs, then clean and degrease the bare metal and let it dry completely. Preparation decides whether the finish lasts, and no amount of good paint makes up for skipping it.
Remove the Exhaust
Take the exhaust off the bike so you can reach every surface being refinished, including the back sides and tight areas where rust starts. Working off the bike also keeps cleaners, abrasives, primer and paint away from the wheel, engine cases and paintwork.
Let the exhaust cool completely first. Follow your motorcycle manufacturer's procedure for removal, since mounting points, fasteners, sensors and gaskets differ from bike to bike.

Remove Paint, Rust and Corrosion
Strip the old paint along with surface rust, scale and loose corrosion using a wire brush, wire wheel, abrasive paper or sandblasting. Work the areas with heavier pipe rust, scaling or pitting hardest, since those are where a new coating is most likely to lift later.
Keep going until the old coating, rust and loose corrosion are gone and bare metal is exposed. If stripping reveals rust-through, badly thinned metal or cracks, repair or replace that component before you refinish anything.
Create the Surface Profile
Bare steel needs an anchor pattern before XTC Primer will bond to it. Sandblasting gives the ideal profile, and after blasting you blow off residual media with clean compressed air. If you are not blasting, a wire wheel, wire brush or 60 to 80 grit abrasive paper produces an equivalent surface. Handle the prepared metal with surgical type gloves so body oils do not land back on it.
How Do You Prepare Chrome and Stainless Steel Exhaust for Paint?
Chrome and stainless steel have to be scuffed until no gloss is left anywhere, because a coating cannot grip a polished surface. Sand the entire surface until the shine is gone, paying particular attention to corners, edges and hard to reach areas. A single missed glossy spot is where peeling starts, and it will spread from there.
Sanding stainless briefly disturbs its passive surface layer, which reforms on its own once the metal is exposed to air. Use clean abrasives that have not been used on ordinary carbon steel, since embedded steel particles will rust and bleed through the new finish.
Clean and Degrease the Exhaust
Wash the exhaust with KBS Klean after abrasive work, not before, so you remove sanding residue along with the grease and oil. The XTC directions specify 10 parts hot water to 1 part KBS Klean for this step. Warmer water makes the cleaner work harder.
KBS Klean is always diluted. Use a heavier mix if the parts are badly contaminated:
- Heavily soiled: 1 part hot water to 1 part KBS Klean
- Moderately soiled: 5 parts hot water to 1 part KBS Klean
- Lightly soiled, including the standard XTC prep wash: 10 parts hot water to 1 part KBS Klean
- Non-ferrous metals such as aluminum, copper and brass: 25 parts hot water to 1 part KBS Klean
- Mix KBS Klean with hot water at the ratio that matches the contamination level.
- Apply with a sponge or bristle brush and scrub, working corners, brackets and joints where grease collects.
- Rinse thoroughly with clean water.
- Let the exhaust dry completely. Trapped moisture causes bubbling once the coating gets hot.
View the complete KBS Klean application instructions.
The wash is also your last good look at the metal. Check for remaining contamination, loose material or corrosion that needs another pass before you open a can of primer.

How to Paint a Motorcycle Exhaust
Paint a prepared motorcycle exhaust with 1 to 2 thin coats of XTC Zinc Rich Primer, then 1 to 2 thin coats of XTC in your chosen color, keeping every coat at 1.0 to 2.0 mils dry film thickness. Apply when the coating, the part and the room are between 50°F and 82°F. Keep every coat thin. A heavy film blisters the first time the pipes get hot.
Apply XTC Zinc Rich Primer
Mix the primer properly before you apply it. XTC Primer is heavily pigmented and can take 5 to 10 minutes with a mechanical mixer to reach a fully homogenous state, touching the bottom of the can repeatedly to lift settled pigment. Then apply 1 to 2 thin coats by brush, roller or spray.
Allow 1 to 2 hours between liquid coats, or 30 minutes between aerosol coats. If you are spraying liquid primer, run 35 to 45 psi on a siphon gun or 25 to 35 psi on a gravity gun with a 1.0 to 1.5 tip, and thin only with KBS #1 Thinner, never lacquer thinner.
You do not have to heat cure the primer before the topcoat goes on. Apply both, then cure once at the end.
View the complete XTC and XTC Primer application instructions.

Apply XTC Xtreme Temperature Coating
Mix XTC as thoroughly as the primer, then apply 1 to 2 thin covering coats over it. For an outdoor part like a motorcycle exhaust, KBS recommends 1 to 2 coats of XTC Primer followed by 1 to 2 coats of XTC color. If you are using XTC on its own with no primer, apply two thin coats instead.
Aerosol cans go on from 12 to 15 inches with steady, even strokes, a minimum of two light coats, 30 minutes apart. Shake the can for a full minute after the ball rattles free, and again during use. Whichever way you apply it, do not chase coverage with a heavy coat. Film thickness is what the heat cure has to work through.

Allow the Coating to Flash Off
Let the finished coating air dry at least 8 hours before any heat reaches it. XTC is tack free and thumb-print free in 30 to 60 minutes at 70°F, but that surface dryness is not what matters here. The 8 hour window is for solvent to leave the film, and heating it early is what traps vapor and bubbles the coating.
Do not mistake this flash-off for the cure. The coating still has to be heat cured, which is the next section.


How to Cure Motorcycle Exhaust Paint
Cure motorcycle exhaust paint by heating the dried coating to roughly 350°F for 20 to 30 minutes, either in an oven or BBQ or by running the engine through four controlled heat cycles. XTC Primer and XTC both need this, and both cure at the same time once the full system is on the part and has flashed off for 8 hours.
Why Heat Curing Matters
The resins in XTC Primer and XTC do not reach full hardness by air drying. The coating feels dry long before it is cured, which is exactly why this step gets skipped and why the finish then chips, scratches or lifts in service.
Heat curing brings the coating to full hardness and tempers the resins into the substrate, which is what gives the finish its adhesion and its resistance to the temperature swings an exhaust lives through. Bring the heat up gradually. Hitting an uncured film with sustained high heat is a mistake you cannot undo.
How to Heat Cure the Coating
Cure XTC in an oven, on a BBQ, or on the bike using engine heat. Ventilate the area fully either way, because the coating can give off harmful vapors during the first few heat and cool cycles. Do not use an oven you also cook in.
To cure with engine heat:
- Give the coating at least 8 hours of flash-off time before you start.
- Reinstall the exhaust and idle the engine until the XTC starts to smoke, then shut it off immediately and let the pipes cool completely to room temperature.
- Repeat that heat and cool cycle so you have done it three times total.
- On the fourth cycle, let the engine keep running after the XTC smokes, until the smoke completely dissipates. Then shut the engine off and let the exhaust return to room temperature on its own.
In an oven or on a BBQ, heat the coated exhaust to about 350°F for 20 to 30 minutes, then let it cool naturally.
Stuck or unsure? Search the KBS Support Desk for instant answers

Common Mistakes When Painting a Motorcycle Exhaust
Nearly every failed exhaust paint job traces back to one of six shortcuts, and all six happen before the finish ever gets hot. Avoiding them is most of the work:
- Painting over rust, scale or loose old paint
- Leaving a glossy, unscuffed surface on chrome or stainless
- Skipping the degrease, or degreasing before abrasive work instead of after
- Applying primer or topcoat too heavily
- Cutting the 8 hour flash-off short before curing
- Skipping the heat cure, or forcing too much heat too fast on the first cycle
Frequently Asked Questions About Painting a Motorcycle Exhaust
What is the best paint for a motorcycle exhaust?
The best paint for a motorcycle exhaust is a silicone based high temperature coating rated well above the temperature the pipes actually reach. Liquid XTC Xtreme Temperature Coating protects metal in continuous service from 500°F to 1500°F and is guaranteed not to burn off. XTC aerosols and XTC Zinc Rich Primer are rated to 1200°F, so use liquid XTC on header pipes that run hotter than that.
Can you paint motorcycle exhausts?
Yes. Coating a motorcycle exhaust is one of the most common uses for XTC Primer and XTC, including Harley-Davidson pipes. The job depends on preparation rather than the paint alone: strip the pipes to bare metal, leave a proper surface profile, degrease, then apply thin coats of primer and topcoat and heat cure the finish.
What type of paint to use on exhaust?
Use a high temperature exhaust paint, not ordinary automotive or engine enamel. XTC is a silicone based coating built for metal operating between 500°F and 1500°F, and it resists thermal shock, UV and weathering. Pair it with zinc rich XTC Primer on an exhaust, because the pipes live outdoors in weather, condensation and road salt.
Can I paint my exhaust with high heat paint?
Yes, provided the high heat paint is rated for the temperature your exhaust reaches and you heat cure it. XTC resins do not reach full hardness by air drying. Allow at least 8 hours of flash off, then cure at about 350°F for 20 to 30 minutes, or run the engine through four heat cycles. Skipping the cure is a common cause of a finish that chips or burns off early.
Do you have to remove all the old paint before repainting a motorcycle exhaust?
Yes, when you are using XTC Zinc Rich Primer. The zinc in the primer protects sacrificially the way galvanizing does, and it has to sit against clean bare steel to do that. Remove the old coating, rust and scale, create the surface profile, then clean and dry the metal before priming.
Can you paint a motorcycle exhaust without sanding or sandblasting?
You can skip sandblasting, but you cannot skip the surface profile. Sandblasting leaves the ideal anchor pattern, and a wire wheel, wire brush or 60 to 80 grit abrasive paper gives an equivalent result. Painting over a smooth, glossy or rusty surface is the single most common reason exhaust paint peels.
Can XTC Xtreme Temperature Coating be applied without primer?
Yes. XTC bonds well straight to properly prepared metal, and XTC Primer is not required for adhesion. The primer is there for rust and corrosion protection. On a motorcycle exhaust, which sits out in weather and road spray, prime first. Without primer, apply two thin coats of XTC instead of one.
Can you paint a motorcycle exhaust by hand with a brush?
Yes. Liquid XTC and XTC Primer brush on well with a natural bristle, poly bristle or foam brush at 1.5 to 2.0 mils wet film thickness. Keep a wet edge, do not flood the surface, and do not overwork the brush trying to erase brush marks. Marks that do not flow out while the coating air dries will flow out during the first heat cure.
Can you paint a motorcycle exhaust without removing it?
You can reach some surfaces with the exhaust installed, but removing it is the right call for a full refinish. Removal gives you access to the back sides and tight areas where rust starts, and it keeps cleaners, abrasives, primer and paint off the wheel, engine cases and paintwork around the pipes.
More answers on this application: Can XTC be used on a motorcycle exhaust? and Can I leave XTC Primer as the finish coat?
Still have questions? Search the KBS Support Desk for instant answers
How to Make Motorcycle Exhaust Paint Last
A motorcycle exhaust finish lasts when preparation, application, flash-off and cure all get done properly, because the finish fails at whichever one you skip. Strip to bare metal, leave the profile, degrease, keep every coat thin, give it the full 8 hours, and finish with the heat cure.
See more restoration projects using XTC and other KBS products.

Tagged Products