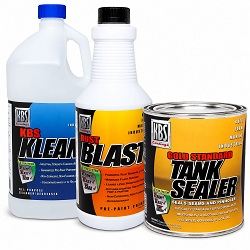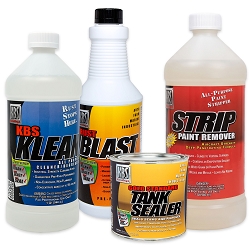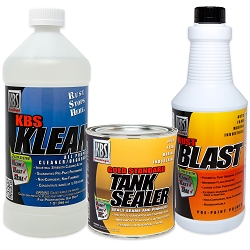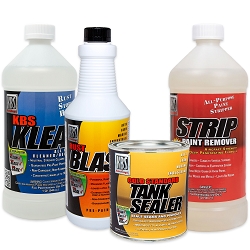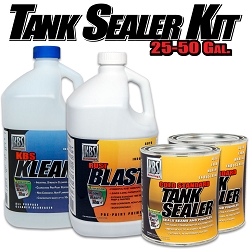


To remove rust from a fuel tank, clean it with KBS Klean, dissolve the rust with RustBlast, then seal the inside with Gold Standard Tank Sealer. Every KBS Tank Sealer System kit includes all three, sized to the tank, so the metal is sealed as soon as the rust is gone.
Updated September 2026 by the KBS Coatings technical team.
- Why Rust in a Fuel Tank Is a Problem
- Should You Replace or Seal a Rusty Tank?
- What the KBS Tank Sealer System Includes
- Which Kit Fits Your Tank?
- What You Need
- Step 1: Clean With KBS Klean
- Step 2: Remove Rust With RustBlast
- Step 3: Seal With Gold Standard Tank Sealer
- Other Tanks and Repairs
- Frequently Asked Questions
| Products | KBS Klean, RustBlast, Gold Standard Tank Sealer |
|---|---|
| KBS Klean mix | 1 part hot water to 1 part KBS Klean for tank interiors |
| RustBlast contact | Full strength, roll and tip every 5 minutes, minimum 30 to 60 minutes |
| Application temperature | 55 to 82 degrees F (13 to 28 degrees C) for Tank Sealer |
| Seal within | 10 days of completing prep |
| Full cure | 96 hours before adding fuel |
| Tank materials | Steel, aluminum and fiberglass |
| Fuels | Impervious to gasoline, ethanol blends (E10, E15, E85), diesel and biodiesel once cured |
Why Rust in a Fuel Tank Is a Problem
Rust in a fuel tank breaks loose and travels with the fuel. Flakes can pass the pump pickup strainer and damage an in-tank fuel pump, collect in fuel filters and restrict flow, and clog fuel injectors and carburetors. Rust can also eat pinholes through the tank wall, which lets fuel leak out.
The classic symptom: the engine idles fine and then starves when you accelerate, because a partly plugged filter cannot pass the flow the engine needs under load.
Should You Replace or Seal a Rusty Tank?
You have two options for a rusty fuel tank: replace it, or clean out the rust and seal the inside. Replacement can be expensive, especially for classic cars where the tanks are pricey, and a new tank that has not been sealed can start to rust again. Sealing the inside of the tank you already own stops the rust where it starts.
What the KBS Tank Sealer System Includes
The KBS Tank Sealer System is a 3-step process that cleans, de-rusts and seals a fuel tank: KBS Klean, RustBlast and Gold Standard Tank Sealer. Each product does one job, and the sealer only holds on a clean, etched surface, so do them in order. Complete steps are in the Tank Sealer directions.
- KBS Klean: a concentrated, water-based, biodegradable cleaner that lifts fuel varnish and tank sludge and rinses away with no residue.
- RustBlast: dissolves rust, corrosion and metal oxides, etches the metal and leaves a zinc phosphate coating for the sealer to bond to. Most rust removers leave bare metal that can flash rust within hours.
- Gold Standard Tank Sealer: a single-component, moisture-cured urethane that seals the whole inside of the tank, including pinholes and weld seams, so fuel never touches the tank walls again.

Which Kit Fits Your Tank?
Pick the KBS tank sealer kit by tank capacity. Every kit includes KBS Klean, RustBlast and Gold Standard Tank Sealer, and the KBS Tank Sealer System page lists size-matched kits for tanks from 1 to 100 gallons.
| Cycle Tank Sealer Kit | Up to 5 gallons: motorcycle, generator, lawn mower, tractor, snowmobile and utility tanks |
|---|---|
| Large Cycle Tank Sealer Kit | Up to 12 gallons |
| Auto Fuel Tank Sealer Kit | Up to 25 gallons |
| Tank Sealer Kit for 25 to 50 Gallon Tanks | 25 to 50 gallons |
What You Need
- A KBS tank sealer kit sized to your tank (see the table above), or the KBS Tank Sealer System for other sizes
- KBS Klean, RustBlast and Gold Standard Tank Sealer: included in the kits, also sold individually
- NuMetal Epoxy Putty (optional): skip it when the tank has no holes larger than a pinhole
- BackBone Reinforcing Mesh (optional): skip it when there are no pinholes or weld seams to reinforce
- KBS Strip (optional): skip it unless the tank was sealed with another product before
- Hurricane Paint Mixer on a drill at low speed, to stir the sealer without whipping air into it
- KBS Paint Spout, to pour the sealer into the tank opening without running it down the can
- Chemical-resistant gloves, safety glasses, and a few nuts, bolts or a length of chain to agitate rust
Step 1: Clean With KBS Klean
Clean the tank with KBS Klean mixed 1 part hot water to 1 part KBS Klean, which is the full-strength ratio for tank interiors. Drain all fuel, remove the tank from the vehicle, seal the openings, pour the mixture in and soak the tank while rotating it periodically. Heavy buildup may need up to 24 hours.
Add a handful of nuts, bolts or a length of chain and shake the tank to loosen stubborn rust. Strain the solution and repeat as needed. Use a flashlight to check for loose rust, rinse until the water runs clear, then dry the tank completely before Step 2.
Step 2: Remove Rust With RustBlast
Pour RustBlast into the tank at full strength, with no dilution, and roll and tip the tank every 5 minutes for a minimum of 30 to 60 minutes. Do not let RustBlast dry on the surface. Drain the RustBlast into a container and repeat for heavier rust. Remove the agitators before you seal.
Drain and rinse once with water, then let the tank dry completely with forced air, a shop vac, a blow dryer or a fan. Rinse once and not too many times, because a thin layer of zinc phosphate should remain. The white, powdery residue is normal and helps the sealer bond, so do not wash it away. It is not necessary to remove every last bit of rust, because Tank Sealer bonds directly to any remaining rust.
Step 3: Seal With Gold Standard Tank Sealer
Gold Standard Tank Sealer seals the entire inside of the tank in one thin coat, including pinholes and weld seams. Seal the tank within 10 days of completing prep, at 55 to 82 degrees F, once the tank is dry and has cooled to room temperature. Never seal in direct sunlight, and avoid rain and high humidity.
Stir the sealer thoroughly, touching the bottom of the can and lifting rather than whipping it. A drill mixer such as the Hurricane Paint Mixer at low speed does this well. Pour the entire contents into the tank and rotate and roll the tank for up to 30 minutes to coat every interior surface. Drain all excess completely, rotating the tank side to side every 5 minutes so the sealer does not pool. Foaming or bubbling while draining is a warning sign of trapped gas.
Let the tank air-dry naturally away from direct sun and heat. Allow a full 96 hours for maximum cure and always test the tank with water before adding fuel. Drained sealer cannot be saved or reused.

Stuck or unsure? Search the KBS Support Desk for instant answers


Other Tanks and Repairs
Gold Standard Tank Sealer bonds to steel, aluminum and fiberglass tanks, and diesel tanks follow the same 3 steps. Fiberglass follows the same 3 steps, but limit RustBlast contact to 2 minutes and make sure the tank is completely dry before sealing. Plastic tanks are a different job, covered in how to seal a plastic fuel tank.
Repair holes larger than a pinhole with NuMetal Epoxy Putty before sealing, and allow 12 hours for it to cure. Reinforce pinholes and weld seams from the outside with BackBone Reinforcing Mesh. A tank sealed before with another product must be fully stripped with KBS Strip first. For a detailed walkthrough on a badly rusted tank, see How to Completely Seal a Rusty Fuel Tank, and for troubleshooting see the Tank Sealer Fix-It Guide.
Frequently Asked Questions About Fuel Tank Rust Removal
What is the best rust remover for a fuel tank?
For a tank you plan to keep, use RustBlast after a KBS Klean cleaning, then seal the inside. RustBlast dissolves rust, corrosion and metal oxides and leaves a thin zinc phosphate layer that Gold Standard Tank Sealer bonds to. Most rust removers leave bare metal that can flash rust within hours, so KBS finishes the job with the sealer.
How do you get rust out of a fuel tank?
Drain and remove the tank, then soak it with KBS Klean mixed 1 part to 1 part hot water and a few nuts, bolts or a length of chain to knock rust loose. Rinse, pour in RustBlast at full strength and roll and tip the tank every 5 minutes for a minimum of 30 to 60 minutes. Rinse and dry completely.
What is the best rust remover for a petrol tank?
A petrol tank is a gas tank, and the KBS process is the same: KBS Klean, then RustBlast, then Gold Standard Tank Sealer. Match the kit to the tank: the Cycle Tank Sealer Kit covers motorcycle and small engine tanks up to 5 gallons, and the Auto Fuel Tank Sealer Kit covers tanks up to 25 gallons.
Can I put isopropyl alcohol in a gas tank?
No. Do not put isopropyl alcohol in a gas tank. To remove rust, drain the tank and clean it with KBS Klean, remove the rust with RustBlast, then seal the inside with Gold Standard Tank Sealer.
Do I have to remove all the rust before sealing a fuel tank?
No. Remove the loose, flaking rust with KBS Klean and agitators such as nuts, bolts or a chain, then treat the rest with RustBlast. It is not necessary to remove every last bit of rust, because Gold Standard Tank Sealer bonds directly to any remaining rust.
Can I use vinegar to remove rust from a fuel tank?
A vinegar-cleaned tank still needs the full KBS 3-step system from the start: KBS Klean, RustBlast, then Gold Standard Tank Sealer. Vinegar does not replace any of the three steps, so do not skip ahead to the sealer after a vinegar soak.
How long does Tank Sealer take to cure in a fuel tank?
Allow a full 96 hours for maximum cure before adding fuel. Let the tank air-dry naturally in a well-ventilated area, away from direct sun and heat, because heating the tank does not speed curing and can hurt adhesion. Always test the tank with water before you add fuel.
Can I use the KBS Tank Sealer System on a diesel tank?
Yes. The same 3 steps apply. KBS Klean removes fuel varnish and tank sludge on the first pass, and cured Gold Standard Tank Sealer is impervious to diesel and biodiesel as well as gasoline and ethanol blends.
Does the KBS Tank Sealer System work on aluminum and fiberglass tanks?
Yes. Gold Standard Tank Sealer bonds to steel, aluminum and fiberglass tanks. Fiberglass follows the same 3 steps with one change: limit RustBlast contact to 2 minutes, and make sure the tank is completely dry before sealing.
Still have questions? Search the KBS Support Desk for instant answers
More answers are in the Tank Sealer FAQs. Let the sealer cure the full 96 hours and test with water before the first fill.
Related guides: How to Completely Seal a Rusty Fuel Tank, Sealing a Metal Fuel Tank, Sealing a Plastic Fuel Tank, or browse all KBS application guides.
Tagged Products